Using a Scheduler to Trigger a Task Periodically
Automated tasks are essential for any production system. Whether you need to generate daily reports, sync data from external sources, or clean up old records, the Schedule Trigger block lets you run workflows on a recurring schedule using cron expressions.
Orixen uses Amazon EventBridge Scheduler to create reliable, serverless scheduled rules that trigger your workflows automatically.
Adding a Schedule Trigger
Drag a Schedule Trigger block onto your canvas and connect it to the workflow you want to run periodically. Configure the cron expression to define when the workflow should execute.
For detailed configuration options and cron expression syntax, see the Schedule Trigger Block documentation.
Recommended Pattern: Dual Triggers
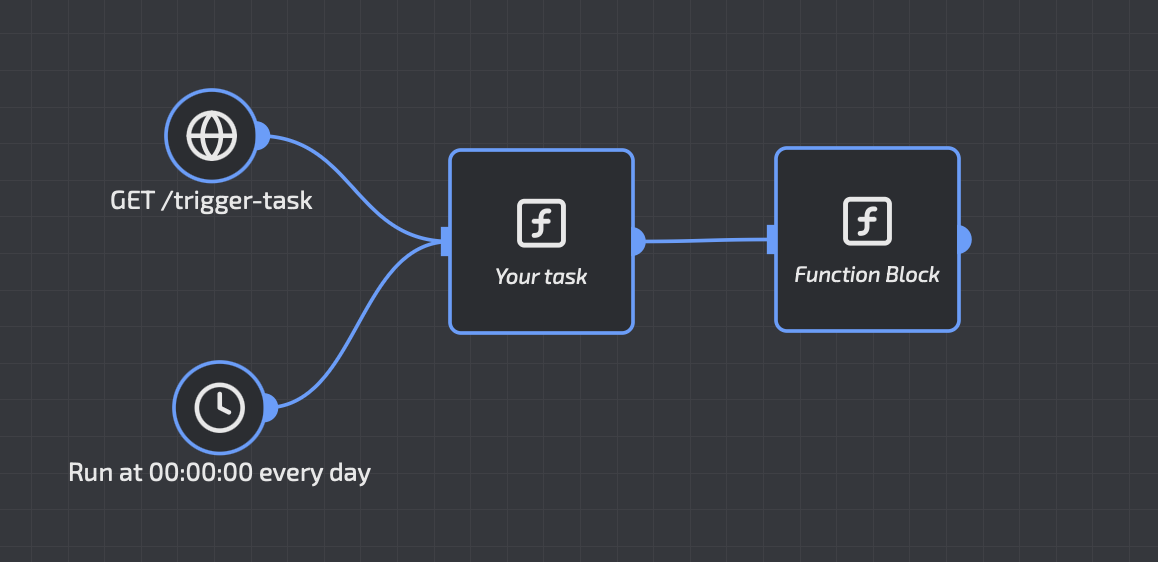
A powerful pattern is to connect both an API Trigger and a Schedule Trigger to the same function. This gives you the best of both worlds:
- Automated execution: Your task runs on schedule without intervention
- Manual execution: You can trigger the task on-demand whenever needed
Why Use Dual Triggers?
| Scenario | Benefit |
|---|---|
| Testing during development | Trigger immediately instead of waiting for the schedule |
| On-demand reports | Generate a report now, not just at scheduled times |
| Recovery from failures | Manually re-run a failed scheduled job |
| Debugging | Trigger the workflow with test data through the API |
This pattern requires no additional code. Both triggers invoke the same function, so your logic remains in one place.
Common Use Cases
Daily Reports
Schedule a workflow to run every morning at 8 AM UTC:
Connect an API trigger alongside for ad-hoc report generation.
Hourly Data Sync
Keep your data in sync with external systems:
Use the API trigger to force an immediate sync when needed.
Weekly Maintenance
Run cleanup or maintenance tasks during low-traffic periods:
Runs every Sunday at 2 AM UTC.
Best Practices
- Start with manual testing: Use the API trigger to verify your workflow works correctly before enabling the schedule
- Use shorter intervals for testing: Test with a frequent schedule (every minute) before switching to production intervals
- Monitor your executions: Check CloudWatch logs to ensure scheduled runs complete successfully
- Plan for UTC: All cron expressions use UTC timezone—adjust accordingly for your local time
- Disable instead of delete: Use the
enabledtoggle (deploy tab) to temporarily stop a schedule without losing your configuration